Category: power lift chairs
Posted by 2026-01-06 11:01
hoyer lift operating instructions
Standard Operating Guide for Hoyer Lift: Ensuring Safe and Error-Free Transfers Every Time
Mastering the correct Hoyer Lift operation process is crucial for guaranteeing care safety and improving care quality. This guide provides you with a complete standardized operating procedure, from preparation to post-operation follow-up.
Pre-Operation Preparation Phase
Environmental Safety Check
Clear all obstacles along the transfer path.
Ensure the floor is dry and level, and remove loose carpets.
Verify that the target location (bed, wheelchair, toilet) is securely fixed.
Confirm there is sufficient operating space (a minimum of 1.5m × 1.5m is recommended).
Equipment Integrity Check
hoyer lift operating instructions
hoyer lift operating instructions
Inspect the sling for wear, tears, or deformation.
Confirm that all hook safety locks function properly.
Test the hydraulic system to ensure smooth lifting and lowering.
Check that the base legs are fully extended and locked.
Verify that the wheels rotate flexibly and the brakes work effectively.
User Condition Assessment
Explain the transfer process and obtain the user’s understanding and consent.
Evaluate whether the user’s current physical condition is suitable for transfer.
Ensure the user’s clothing is flat and free of wrinkles.
Check the user’s skin condition, with special attention to pressure-sensitive areas.
Ten-Step Standard Operation Procedure
Step 1: Proper Sling Placement
Assist the user in lying on their side (if possible).
Lay the folded sling flat under the user’s back and buttocks.
Ensure the sling’s centerline is aligned with the user’s spine.
Help the user return to a supine position and arrange the leg straps of the sling.
Adjust the sling to a comfortable position, avoiding wrinkles.
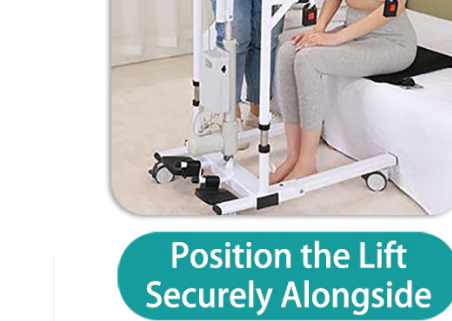
Step 2: Precise Equipment Positioning
Push the lift close to the bed edge at a 45-degree angle.
Ensure the base legs extend securely under the bed.
Engage the brakes on all wheels.
Adjust the lifting arm to be directly above the user.
Confirm the equipment is stable and does not wobble.
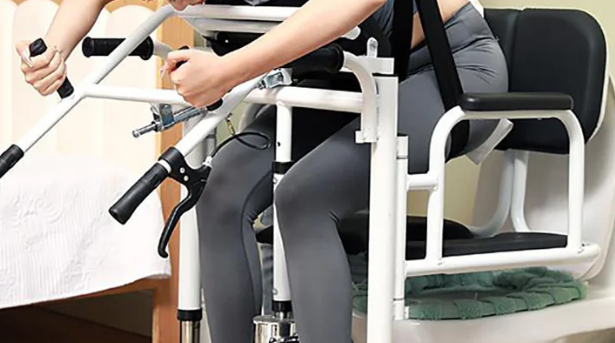
Step 3: Confirm Safe Connection
Connect the sling to the lift following the "far-to-near" principle.
Verify the "click" sound of each hook locking into place one by one.
Double-check that all hooks are fully locked.
Ensure the sling bears weight evenly at all four corners.
Check that the sling’s position will not cause discomfort to the user.
Step 4: Test Lifting
Operate the lift slowly to raise the user slightly (5–10 cm).
Pause to check the equipment’s stability and the user’s condition.
Continue lifting smoothly if no abnormalities are found.
Lift the user to a safe height (15–20 cm above the bed surface).
Observe the user’s reaction to ensure comfort.
Step 5: Prepare for Equipment Movement
Confirm the transfer path is unobstructed.
Release the brakes on all wheels.
Assume a stable pushing posture.
Prepare to start the smooth transfer.
Step 6: Execute Smooth Transfer
Push the equipment slowly at a constant speed.
The caregiver should walk backward to guide the lift while observing the path ahead.
Keep the equipment moving in a straight line and avoid sharp turns.
Move the user accurately to a position directly above the target location.
Step 7: Fine-Tune Positioning
Use the lifting arm’s telescopic function to make minor position adjustments (if available).
Ensure the user is directly above the target location.
Conduct a final check before lowering.
Engage the brakes to secure the equipment.
Step 8: Safe Lowering Process
Operate the lift to lower the user slowly.
Pause briefly when approaching the contact surface (e.g., bed, wheelchair seat).
Make minor adjustments to ensure the user is seated accurately.
Lower the user completely and confirm they are in a stable sitting position.
Step 9: Disconnection Sequence
Wait for the user to adjust to the new position.
Unhook the sling in the "near-to-far" order.
Ensure the hooks are placed safely to avoid injury.
Gently pull the sling out from under the user.
Step 10: Post-Operation Tidying
Assist the user in adjusting to a comfortable posture.
Push the equipment back to its storage location.
Clean and disinfect the used sling immediately.
Record important information about this operation.
Key Operation Points for Special Scenarios
Special Instructions for Wheelchair Transfers
Position the wheelchair at a 30-degree angle to the bed.
Remove the wheelchair’s armrests and footrests in advance.
Be careful to avoid the user’s knees colliding with the wheelchair.
Confirm the wheelchair brakes are engaged before lowering the user.
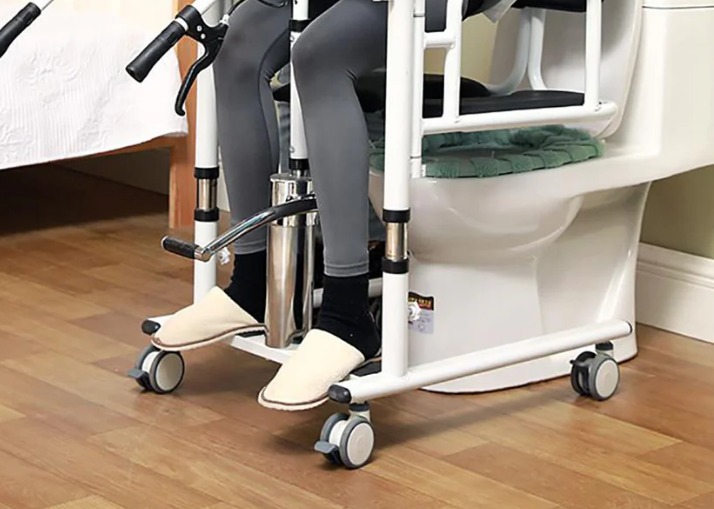
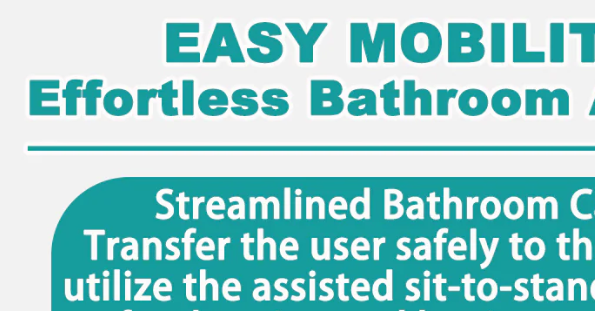
Special Precautions for Bathroom Transfers
Use a dedicated bathing/toileting sling.
Ensure there is sufficient operating space around the toilet.
Pay special attention to floor slip prevention.
Prepare quick-cleaning supplies.
Standard Operating Procedures for Floor Rescue
Only use a dedicated floor rescue sling.
Two caregivers are recommended to operate together.
Adopt a phased lifting strategy.
Closely monitor the user’s physical condition.
In-Depth Analysis of Safety Standards
Ten Prohibited Practices
Exceeding the equipment’s rated weight capacity.
Operating on sloped or slippery floors.
Using worn, torn, or defective slings.
Leaving a suspended user unattended.
Operating the equipment without engaging the brakes.
Lifting/lowering the user rapidly or moving the equipment quickly.
Allowing the user’s body to collide with obstacles.
Using non-original or uncertified accessories.
Manually interfering with the equipment while it is in operation.
Ignoring the user’s signals of pain or discomfort.
Emergency Handling Procedures
Stop operation immediately and reassure the user.
Assess the severity of the situation.
Activate the corresponding emergency response plan.
Seek professional medical assistance if necessary.
Record details of the incident for subsequent analysis.
Maintenance and Care Guide
Daily Maintenance Checklist
Clean the equipment surface after each use.
Inspect the sling for wear.
Test the function of the hydraulic system.
Confirm all safety devices are in normal working order.
Weekly In-Depth Inspection
Check for cracks or deformation in structural components.
Test the emergency lowering function.
Inspect the wheels for wear.
Confirm all labels and markings are clearly legible.
Monthly Professional Maintenance
Arrange for qualified technicians to conduct a comprehensive inspection.
Check the hydraulic oil level and quality.
Test all mechanical connection points.
Perform load tests to verify performance.
Skill Improvement Recommendations
Basic Skill Mastery
Complete at least 8 hours of practical operation training.
Pass the assessment for the standard operating procedure.
Master emergency handling methods.
Understand the basic principles of the equipment.
Advanced Skill Development
Learn techniques for handling special scenarios.
Master the multi-person collaborative operation process.
Develop risk assessment capabilities.
Improve communication and reassurance skills.
Continuous Learning Path
Attend refresher courses every six months.
Stay updated on equipment upgrades and technological advancements.
Participate in user exchange meetings.
Learn the latest care knowledge.
Conclusion
Correct Hoyer Lift operation is not just a technical skill, but a responsibility. hoyer lift operating instructions Every safe transfer is built on strict adherence to operating standards. Through systematic learning, repeated practice, and continuous improvement, we can provide users with safe and comfortable transfer experiences. Remember: professionalism comes from attention to details, and safety comes from compliance with standards. Let us use professional knowledge and a dedicated attitude to ensure every operation becomes a process of building safety and trust.